

I got bit by that notorious lovebug this Valentine’s Day, and to my dismay, a topical ointment has not yet been developed for it, so I just had to do a photoshoot to get rid of the itch. I teamed up once again with the always wonderful MUA Raushanah Washington to create some really romantic beauty looks. Our visage au choix was that of the beautiful Emily D. What you couldn’t see in these shots is that Frankenstein, Raushanah’s adorable bichon frise, was pretty much on top of me the entire time. All creative direction credit goes to him.
For these looks I knew the setup had to be tight and concise since space was limited; we shot in a living room with average height ceilings. Also because I didn’t have any grids handy (my personal go-to modifiers for beauty), I knew that I had a bit more of a challenge on my hands since Emily’s porcelain skin was highly reflective, and with the lights so close it was important to not lose detail. The fact that all three looks turned out to be lit using low-level lighting techniques was a coincidence, but lets pretend that I’m just awesome that way and meant for it to happen. Ok? Ok.
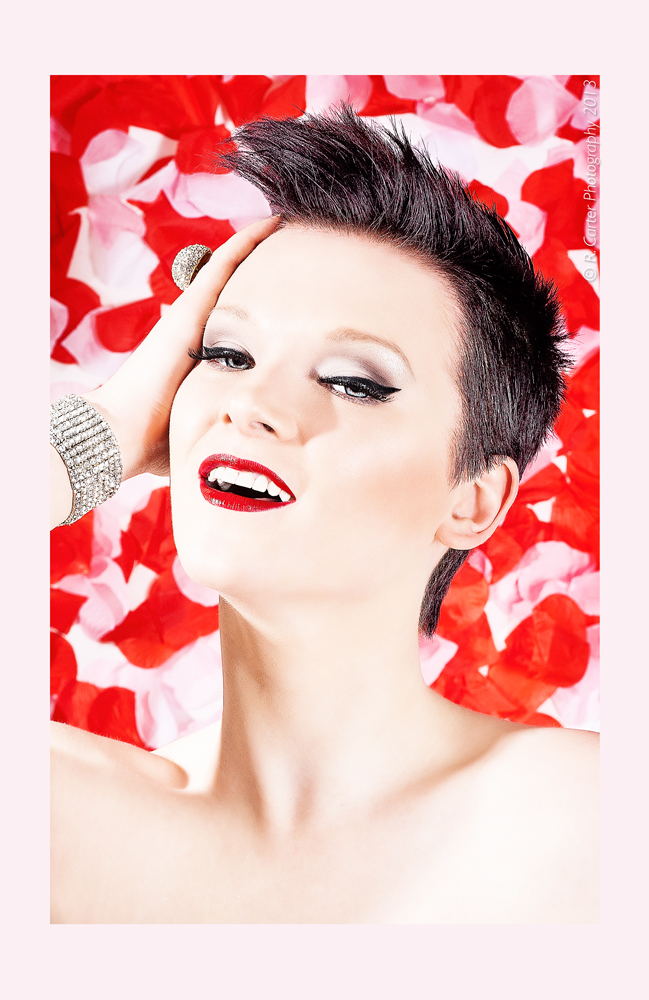
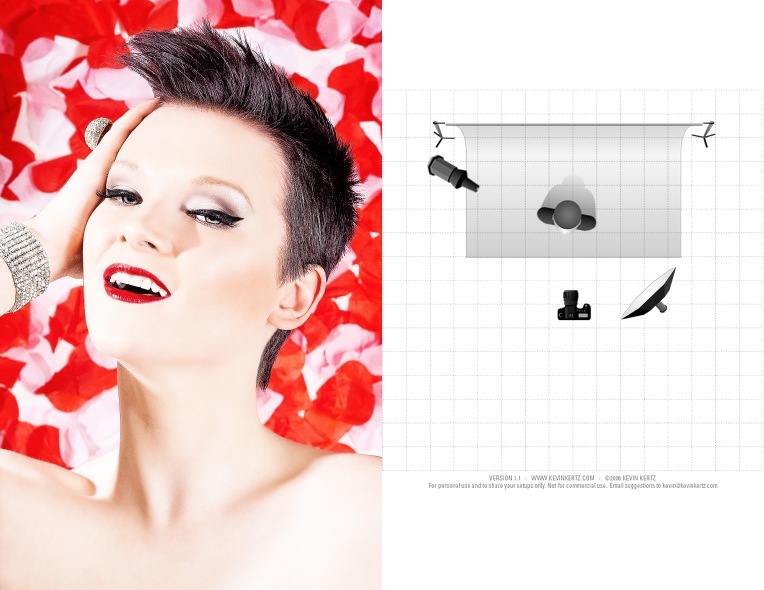
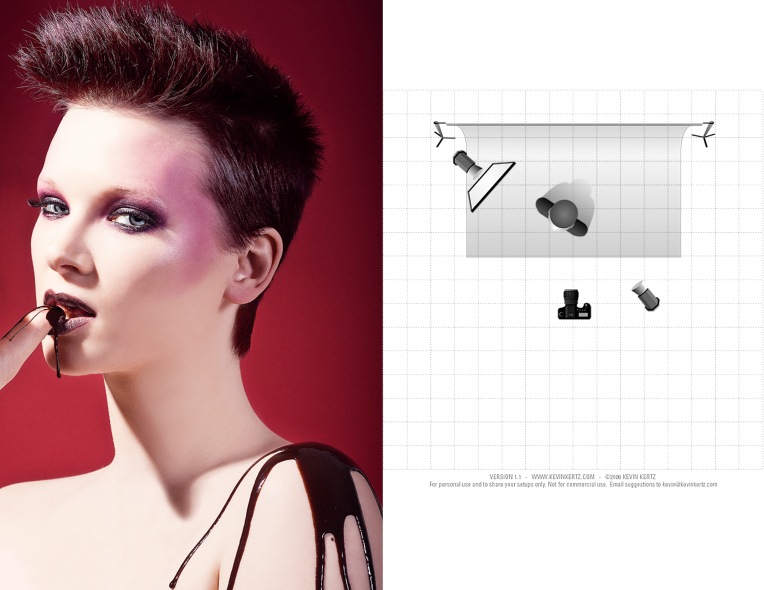
CLASSIC: This look, inspired by classic Hollywood lighting, was achieved using a 2-light setup. The main/fill light, a 3ft parabolic softbox, was positioned directly to my right and slightly behind me, directed at a 45-degree angle at the model. The head itself was below shoulder height, but because of the width of the softbox, the light was pretty directionless. The key light here was a head set almost at full power with a 40-degree gridded snoot. This light was set high to the left and a little behind the model, pointing directly at her. If you don’t have a snoot, a 20, 30, or 40-degree grid spot will do, although it won’t give you as narrow a beam.
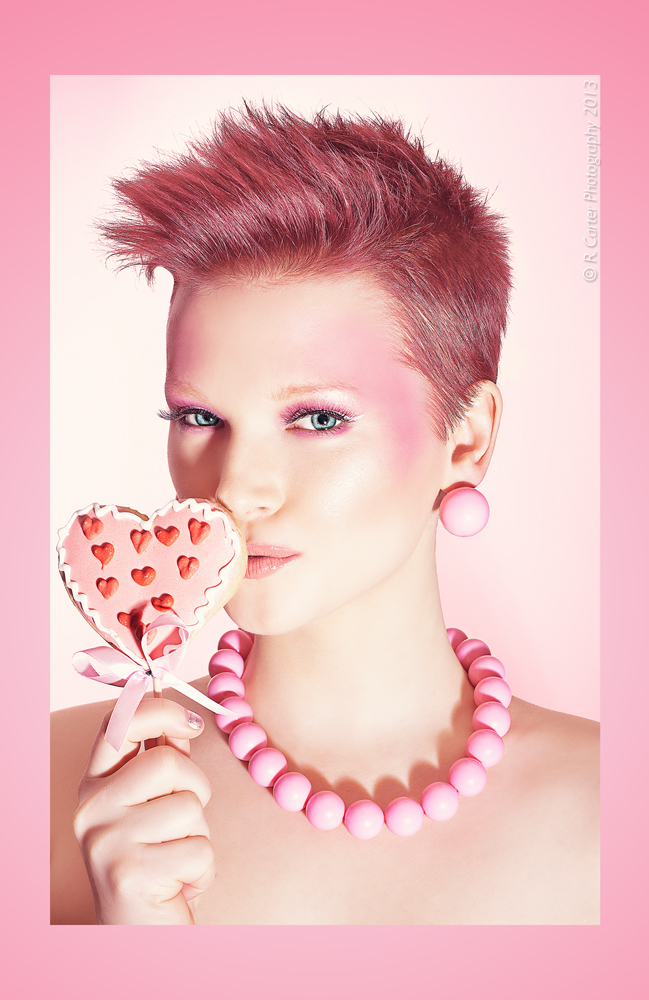
SWEET: For this look, I wanted lighting with a fun, playful pop. In this 2-light setup, the main light was a head with just a silver dome reflector, in the same position as before, just slightly lowered to create the graphic shadow cast by her necklace. I didn’t include any kind of diffusion on this light because the makeup, particularly the type of bronzer and highlight powder Raushanah used, is wonderfully luminescent, and I really wanted to it to shine. The key light was a head at half power molded using Cinefoil. If you’ve never experimented with that stuff, I highly recommend it! It’s extremely versatile as a light modifier, and can save you money if you’re just starting out and can’t afford separate modifiers like strip softboxes or grid spots. In case you’re wondering – and I know you are – yes, that cakepop was delicious.

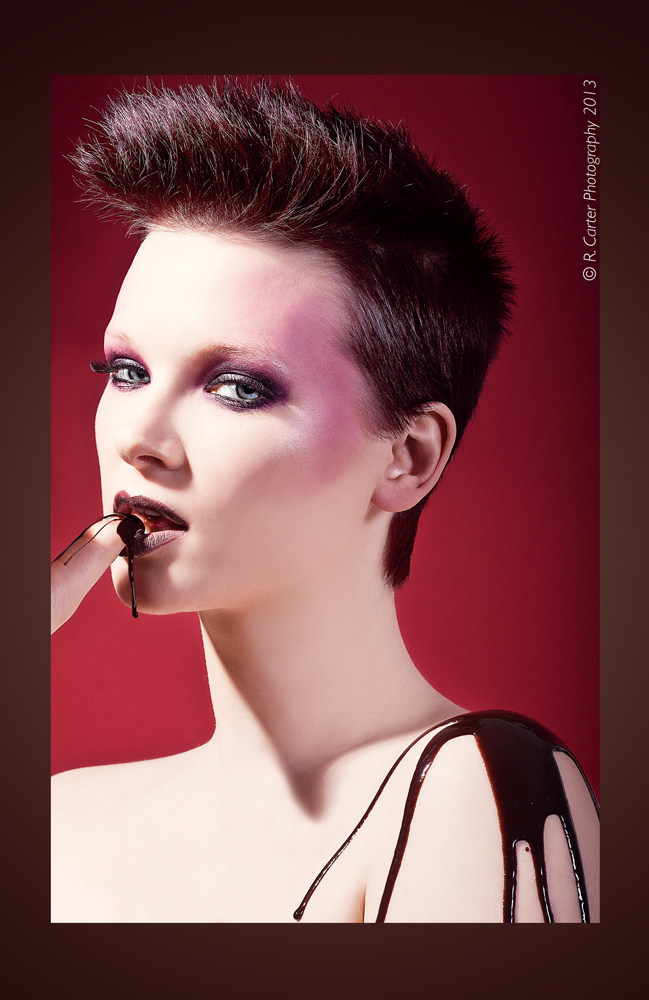
SEDUCTIVE: This look was a tough one due to a number of factors: a) I didn’t have any solid ideas of how I wanted to light it like I did for the other two, b) we were working with chocolate syrup, which, besides being incredibly aromatic and tempting, was incredibly messy and kind of a one-shot deal, and c) we were running very low on time, and had about 7 minutes to get the shot before our model had to skedaddle. Our main light here was in the same position as our key light from the Classic shot; high to camera left and pointing slightly behind the model so that it gradated onto the background. Instead of the Cinefoil to modify the light this time, I used a scrim from a softbox to diffuse the shadow transfer edge, and turned the power down about a stop. The fill light here was a head with just a silver dome reflector powered down to a little less than half. It was left in the same position as our main light in the second shot.
Tip: Something to keep in mind when using low-level lighting techniques is to be aware of odd shadows, they can really ruin a shot! Features that are usually easy to light overhead can become misshapen when the light comes from below, as you no doubt found out as a kid playing with flashlights. One of my favorite things about low-level lighting is the glow that it creates that just seems to exude life and energy.
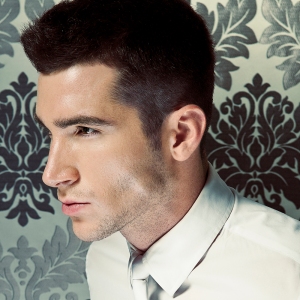
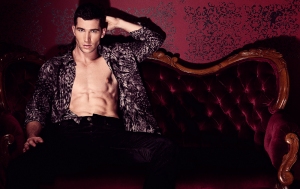
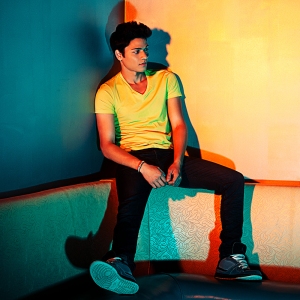
Here are some other examples of low-level lighting I’ve done over the years:
I hope this post was helpful, informative, or atleast entertaining! If you have any questions or comments, by all means don’t keep them to yourself! Share them down below in the comment section or email them to me directly at rcarterphoto@gmail.com.
Also, if there are any studio lighting setups that you’d like to me to recreate, or any from my website that you’d like an explanation of, let me know! I’m up for the challenge and here to help!!
